You might want to import keys for the following reasons:
1. You want to use a key from a public authority (CA) rather than generating one in FileAssurity. You might want to do this if you want other people to be able to automatically verify your signature without having to import your key. If you generate a key in FileAssurity it is not automatically recognized by others (because it has been self-signed and cannot be checked back to a public authority).
2. You want to be able to send protected files to other people. If you do not import their protection key(s) then you will not be able to protect files for them.
3. A person who has sent you signed files has generated a self-signed key using FileAssurity and you want to to be able to verify the files came from them and have not been tampered with.
NOTE: When you import other peoples keys, they can only be used to verify files and to protect files for them.
Keys can be imported to Key Manager using the
NOTE: If someone has e-mailed a key to you it must first be saved to disk before it can be imported.
To import a key:
1. From the File menu select 'Import Key File'
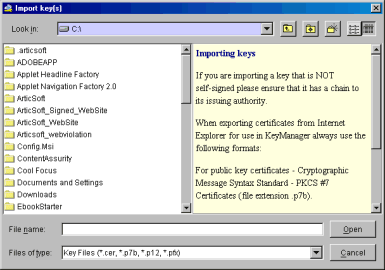
2. The following dialog is displayed:

Locate the key, either by typing in the location and file name or browse for it using the directory tree.
Press
3. The following dialog is then displayed:
NOTE: If you are importing a key file that contains a private key then the following dialog will have an additional field displayed - 'Secure Key File - Please enter password'. You need to enter the password that protects the key file before any key information can be displayed.

Select the keys you want to add to Key Manager by checking the appropriate boxes in the 'Add' column. Then press
NOTE: Where a key also has a chain, all the keys in the chain are shown. Selecting the first key in the chain and checking the box in the 'Add' column automatically selects the chain.
If a key with an identical identity (the actual cryptographic key is the same) is already present in Key Manager, the key is not added and a warning is given. This is true regardless of whether the name of the key is different.
If a key with an identical name (but the actual cryptographic key is different) to one already in Key Manager is added, it will be added, but it's name will be altered by the addition of '_n' where n is the current number of times that name occurs. This feature is provided to help you differentiate between keys of the same name in your keystore. You may change the name to anything you wish once the key has been added. For example, if you have a key called 'John Smith' in your keystore and you import a second key with the name 'John Smith', then providing the second key is cryptographically different it will be imported with the name 'JohnSmith_1'.
Buttons
NOTE: You do not need to add a key to your keystore to use this function. You can use it to check information about the key before adding it. Where a key chain is shown you must highlight the specific key in the chain for which you wish to see advanced information.
Notes
Notes associated with each key can be edited at this stage, or at any time after the keys have been imported into Key Manager.
 Select this to remove any changes you have made
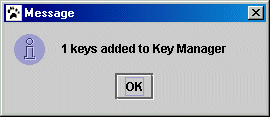
4. On successful importation of the key(s) a dialog box is displayed informing you of the number of keys imported:

NOTE: When a chain has been imported, all the keys in it will be reported as being added, not just the one from the sender.
Invalid Keys
If the keys you have selected are invalid for any reason, you will not be able to import them. A message will be displayed on the Key Import dialog explaining why they have failed - for example, 'Cannot add keys, key chain invalid'. The only option you can then select is
